Thursday, May 28, 2009

Lemon Cheesecake Soufflés with Crushed Raspberry Sauce

Although I cook a lot there are certain recipes which I have never tried for one reason or another. Until a couple of weeks ago, one of these was a soufflé. It seemed to be too difficult; fussy, with a lot of prep and, when we entertain, I like to have dessert made and ready to go (except for garnishing) after the meal. Whipping up a soufflé and baking it seemed as though it would be too time-consuming.


I have been corrected. :)


I found this recipe in a February 2007 issue of Cuisine at Home magazine, and it really called out to me. Lemon cheesecake soufflé. I adore cheesecake, and lemon is such a lovely springtime flavor, plus the accompanying raspberry sauce would go with it so well. I just had to try it.


Now, the original recipe was for 8 servings and I was only going to make two. Because if I made 8 (6, 4…), we would eat them all. I wasn’t certain if soufflés would take to being leftover well, so I would only make what we should eat.


Of course, scaling the recipe down so much left me with needing to use ¾ of an egg yolk, and 1-1/4 egg whites. I considered doing just that, extra preparation steps with beating the yolk or white, and measuring them, but decided against it. Life is too short. I used a whole yolk, and one white. And it worked just fine.


I first made the raspberry sauce and set it aside. The original soufflé recipe called for buttering the ramekins and sprinkling with crumbs, then baking the “crust”. I skipped this step, preferring to spray the ramekins with cooking spray and not using the crumbs at all. I also made a small change in how the lemon mixture was prepared, but that was minor and was only to make that particular step a little easier. I also used fat free “Super Skim” milk and neufatchel cheese.


As an experiment I prepared the batter a few hours in advance, filled the ramekins, and kept them in the refrigerator until I preheated the oven (I used a toaster oven for the 2 ramekins), at which time I placed them on the counter to start to come to room temperature. Then they were baked. They rose very nicely, about 1” above the rims of the ramekins. But be warned, they are to be served immediately. Get some powdered sugar in a small strainer or sifter, have small plates at the ready for placing the soufflés on after they are removed from the oven, and have the sauce already on the table for everyone to use.


Mine fell after about a minute, so take those babies out of the oven, plate, dust with powdered sugar, and serve.


I understand that you can refrigerate any leftovers and that although they taste great, they will not be “pretty”.


All told, this really was a super-easy recipe, and yielded great results. The soufflés tasted lemony and very cheesecake-like, and were nice and light in texture. The raspberry sauce is a perfect accompaniment, and I added a little Chambord-cornstarch mixture (2 tablespoons of the black raspberry liquer to ¾ teaspoon cornstarch) to punch up the berry flavor and thicken the sauce as well.


Excellent choice for a spring or summer dinner party, and now I know that they can be prepped ahead I will definitely make them again.


* Exported from MasterCook *


Lemon Cheesecake Soufflés with Crushed Raspberry Sauce


Recipe By: Cuisine At Home, Issue 63

Servings: 4


Amount Measure Ingredient -- Preparation Method

-------- ------------ --------------------------------


1/2 cup 2% low-fat milk (I used Super Skim fat-free)

1/4 cup sugar

2 ounces cream cheese -- cubed, softened (I used neufatchel)

1/4 cup fresh lemon juice -- strained

1/8 cup all-purpose flour

1/2 tablespoon fresh lemon zest -- minced

1 1/2 large egg yolks -- room temperature

1/8 teaspoon vanilla extract

2 large egg whites -- room temperature

1/4 teaspoon kosher salt

1/8 teaspoon cream of tartar

2 tablespoons sugar

6 ounces raspberries -- frozen

1/4 cup sugar

1/2 teaspoon fresh lemon juice

pinch salt


Preheat oven to 400F


Coat 4 6-ounce soufflé cups with cooking spray, and then set aside.


Combine egg yolks and vanilla, in a small cup and set aside. Simmer milk, sugar, and cream cheese over low heat until cream cheese melts. Add the lemon juice and zest and flour and whisk until smooth. Turn up the heat to medium-high and whisk constantly until thick and bubbly, about 4 minutes


Whisk the egg yolk mixture into the lemon mixture and cook for 2 minutes. Transfer pan to a bowl filled with ice water to cool.


Beat egg whites with salt and cream of tartar to soft peaks in a bowl with an electric mixer on high speed.


Gradually add 2 tablespoons sugar, beating until stiff peaks form. Blend 1/4 cup of the whites into the lemon mixture with a whisk, and then fold in the remaining whites until there are no white streaks.


Fill the ramekins 1/2" from the top with the batter and bake on a baking sheet until puffed, 18-20 minutes. Test for doneness by inserting a skewer into the center-- the soufflés are done when the skewer comes out clean or just slightly moist.


Dust with powdered sugar, serve immediately with warm raspberry sauce.


RASPBERRY SAUCE: Simmer all ingredients in a saucepan for 5 minutes, then crush with a potato masher.


Source:

"CAH Issue 63"

- - - - - - - - - - - - - - - - - - -


Per serving as made in the original recipe:

255 Calories (kcal); 8g Total Fat (4g Saturated); (26% calories from fat); 6g Protein; 42g Carbohydrate; 98mg Cholesterol; 222mg Sodium

Food Exchanges: 0 Grain(Starch); 1/2 Lean Meat; 0 Vegetable; 1/2 Fruit; 1 1/2 Fat; 2 Other Carbohydrates

Using skim milk and neufatchel cheese:

Per serving: 242 Calories (kcal); 6g Total Fat (3g Saturated); (21% calories from fat); 6g Protein; 43g Carbohydrate; 93mg Cholesterol; 237mg Sodium

Food Exchanges: 0 Grain(Starch); 1/2 Lean Meat; 0 Vegetable; 1/2 Fruit; 1 Fat; 2 Other Carbohydrates


Monday, May 18, 2009

Bacon, Lettuce, and Tomato Bucatini

Now that I am feeling more like being outside and working in the garden, flower beds, etc. I have found myself, a few times this week, totally surprised when Jack will suddenly appear beside me and say “it’s six o’clock, when’s dinner?”. To which I think “what’s for dinner?” but, attempting to appear as though I can do it all, I will reply that we will eat in an hour. He goes back to his office, apparently satisfied with the answer, and I start to rack my brain for really quick meal ideas as I try to straighten up and walk normally.


Of course, pasta is always an option. Cuisine at Home’s recipe, Bacon, Lettuce, and Tomato Bucatini, is one of our favorites and a welcome step up from the usual spaghetti with red sauce. I had a leek, a bag of spinach, and grape tomatoes on hand, so this was an easy choice for dinner that evening.


The finished dish is topped with garlic bread crumbs, which does add a very nice finishing touch, but sometimes I am in too much of a hurry to bother. This time I did make it because I had bought a French baguette the other day while in the Strip District. I also bought, at the huge Italian grocery store, a bag of bucatini. I had always made this recipe with spaghetti before, and this time I was able to prepare it with that specialty pasta. Bucatini is a very thick, hollow spaghetti, and I subsequently found it to be a little difficult to “twirl” on a fork, but that may have been because I am used to the thin or regular-thickness spaghetti. It also did not come in a whole wheat version (surprise, surprise), and Jack was pleased to get “real pasta” at this meal.


Anyway, the bread crumbs are made first and set aside. Once the ingredients are prepped, this takes only a few minutes to put together.


I used turkey bacon. I found a wonderful brand, Kutztown, at Sam’s Club. It is thick-sliced and has a good smoky taste; other turkey bacon seems to be very thinly sliced and I find that it burns quickly.

(Note: as of early 2010, this same bacon is now being sold under Sam's Club "Member's Mark" brand. Same great turkey bacon, it reminds me somewhat of Canadian bacon).


The bacon is cooked and chopped and set aside, the tomatoes and leeks are sautéed, wine and broth added, then the last step is adding spinach (not lettuce!), fresh thyme, and the bucatini. Now, the tricky part in this is having the pasta done just as the rest of the dish is cooked, and transfer the pasta directly from the pot to the sauce without draining. This allows some of the pasta water to be transferred along with the pasta itself, adding needed moisture and a little starch to build the sauce up a bit.


I find that putting the water on to boil before you even make the crumbs is the best way to ensure that the pasta is ready when you need it to be (if it comes to a rolling boil and you aren’t ready to put the pasta in it yet, turn it down to a simmer and partially cover. It will then take about 30 seconds to come back to a boil when you need it). Bucatini takes about 10 minutes to cook, so if you put the pasta in the water just before you add the leeks to the tomatoes, it should be ready when needed.


Jack is always surprised that there is no cheese grated on top, but then always mentions that the dish is so flavorful that it doesn’t need the cheese. And I agree.


* Exported from MasterCook *


Bacon, Lettuce, and Tomato Bucatini


Recipe By : Cuisine At Home

Servings : 2


Amount Measure Ingredient -- Preparation Method

-------- ------------ --------------------------------

3 teaspoons olive oil -- divided

1 medium garlic clove

1 ounce French baguette slice

2 pieces turkey bacon

1 cup grape tomatoes -- halved

1/2 teaspoon sugar

1/2 cup leeks -- white and light green parts thinly sliced

1/4 cup dry white wine

1/2 cup low-sodium chicken broth

1 teaspoon red wine vinegar

1/4 teaspoon red pepper flakes

4 ounces spaghetti -- (bucatini)

1 cup baby spinach leaves

1/4 teaspoon minced fresh thyme


Set a large pot of water on to boil.


Mince the garlic in a food processor, add the cubed bread, and process until coarse. Heat 1 teaspoon of oil in a nonstick skillet over medium heat, add crumbs and toast, stirring often, until golden. Remove crumbs to a plate, season with salt and pepper, and set as1de.


Drizzle 1 teaspoon of the oil into the pan and add the bacon. Cook until crisp, pat off excess fat on paper towels, chop, and set aside.


Drizzle the final teaspoon of oil into the skillet, place over medium heat, and caramelize the tomatoes and sugar until the tomatoes begin to brown (about 4 minutes). * Add the leeks and sauté for another 4 minutes until the leeks are wilted.


*As you add the leeks to the tomatoes, also put the bucatini into the boiling water to start to cook.


Deglaze the tomato mixture with the wine, and simmer until it is nearly evaporated. Add the broth, vinegar, and pepper flakes and simmer until reduced by 1/3, about 5 minutes. Add the spinach and thyme, stir, then add the bacon pieces and transfer the cooked pasta from the water directly into the pan. Toss to coat, season with salt and pepper, and divide between 2 plates. Sprinkle with bread crumbs and serve.


- - - - - - - - - - - - - - - - - - -

Per serving: 411 Calories (kcal); 12g Total Fat (3g Saturated); (26% calories from fat); 15g Protein; 60g Carbohydrate; 12mg Cholesterol; 310mg Sodium

Food Exchanges: 3 1/2 Grain(Starch); 1/2 Lean Meat; 2 Vegetable; 0 Fruit; 2 Fat; 0 Other Carbohydrates


Thursday, May 14, 2009

Wild Mushroom Agnolotti with Caramelized Shallots, Thyme, and Mushroom Broth


About 4 weeks ago, a package arrived via Fed Ex. After looking at the return label I knew what was inside, but was surprised at how large (16” square) this box was. I opened it and saw that it was lined with an inch of Styrofoam on each side, then some crumpled brown paper, then a couple of ice packs, then… voilá! A 4” x 8” package of Buitoni Wild Mushroom Agnolotti!


Being Earth Week, and being the kind of reuse/recycle person I am, I couldn’t help but wonder why such a large box was used for a small package of pasta. But, also because I am a reuse/recycle person, you may be assured that I will be reusing and recycling the various parts of this box to within an inch of their little recyclable lives.


Because I had a nasty cold when the pasta arrived, I placed it in the refrigerator to await another day.


Unfortunately, if you’ve been reading my bog regularly, you will know that this cold proceeded to get worse, then it turned into a severe asthma attack necessitating two trips to the doctor’s office for breathing treatments (one on my birthday! *whine*), then a few weeks of recovery. During this time I cooked very little, both because I was tired and coughing and wheezing, but also because food tasted weird to me. Probably due to the medication, and I give Jack lots of credit for eating the simple, quick meals which I made without a single complaint.


As I started to feel better I became preoccupied with a backlog of stuff that had been tossed aside awaiting my recovery. Occasionally I would see the agnolotti in the refrigerator and think that I just had to figure out a really wonderful way to make this pasta, but my creativity was fairly nonexistent. Yes, I could have simply tossed the pasta with some olive oil, garlic, and Parmesan but that seemed rather unexciting. Then, as the asparagus in the garden started to grow, I was considering a sauce based on that since mushrooms and asparagus taste so heavenly together. But, as I said, I just didn’t feel like doing it.


Then I saw a recipe on the Foodbuzz site posted by Chefectomy (Marc) for Wild Mushroom Agnolotti with Caramelized Shallots, Thyme, and Mushroom Broth. This caught my eye because I actually had shallots on hand, and a mushroom-and-wine broth was used rather than a heavier, cream-based sauce.


This really was a quick recipe and so very, very delicious. Both Jack and I swooned. The mushroom broth was a perfect compliment to the agnolotti filling, and the cremini mushrooms, caramelized onions and thyme brought it all together into a wonderful blend of flavors.


I had some fat asparagus spears which I had just picked that afternoon in the garden. Seeing that this meal needed a vegetable, I steamed them, tossed with some fresh lemon juice, and served the asparagus in the same bowl as the pasta. Excellent. On the side, a few slices of the Olive Oil-Rosemary Boulé which I had baked a few days earlier (seriously, even though I was too wiped to cook, I’d have to be dead not to bake bread. Hey, I rhymed!). :p


On a scale of one to ten, Marc’s recipe rates a twelve! And, even though I have never bought fresh stuffed pasta before (I try to convinice myself that it's really not so difficult to make it...), I will certainly be purchasing this again. In fact, I'm not even going to try to get creative with the wild mushroom agnolotti, when this recipe is such a perfect way to prepare it.


And I really believe that it was this particular recipe which started my culinary recovery. The evening after I made this, we had the primavera with seared seafood (previous post), and I now have a backlog of some pretty incredible recipes to get typed into the computer and posted here. So stay tuned, I’m back!


Oh, and for those who asked, I’m running again as of last Saturday (exactly one month since I last went out). A wimpy 2 miles, but I did it and was breathing rather normally. And breathing is good! :)


Monday, May 11, 2009

Primavera with Seared Seafood

I have made several recipes from a particular issue of Cuisine at Home magazine, and even had the Primavera with Seared Seafood marked, but had never had the opportunity to prepare it until recently. Big, huge error on my part! Rarely do I come across a recipe that is so delicious, so easy and so very company-worthy.

There were a few changes to the recipe, however. First, Jack hates goat cheese despite my attempts to introduce it into dishes so that he will become accustomed to it. It was a pain to do this, but after simmering the vegetables in the pasta water I transferred a little more than half into another pan. In one pan went the goat cheese, in Jack’s portion I added neufatchel. I did taste his, and while it was good, I much prefer the tangy flavor of the goat cheese. And, surprise, the goat cheese contained less fat that the neufatchel!


Speaking of goat cheese, I decreased the amount called for in the recipe. I used 1 ounce in my portion, and felt that it was the perfect amount for me—nice and flavorful with that goat cheese “tang”, but not overpowering.


Also, I did not have broccoli so I used twice as much asparagus, and I doubled the seafood as well. Oh, why not?


Now, look at this beautiful dish. There was nothing about this recipe that I did not like—the lemon and goat cheese flavors blended so well with the seafood and vegetables and pasta. Heavenly. And I plan to make this for my parents when we visit them later this month because they also will love it, I’m sure.


A note, I tasted Jack’s portion with the neufatchel cheese and although it was quite good, I will continue to make my serving with goat cheese because it added so much flavor.


Here is the recipe as it appeared in Cuisine at Home. My changes of adding more seafood and decreasing the goat cheese saved me a total of 7 grams fat, 4 saturated. This meal was higher in fat than I would like, so every little bit helps, I guess!


* Exported from MasterCook *


Primavera with Seared Seafood

Recipe By : Cuisine at Home magazine
Serving Size : 2

Amount Measure Ingredient -- Preparation Method
-------- ------------ --------------------------------
2 tablespoons olive oil -- divided
4 jumbo shrimp
4 large sea scallops
1/2 teaspoon fresh lemon zest
salt and pepper
1/2 cup broccoli florets
1/2 cup asparagus tips
1/3 cup diced onion
1/3 cup bell pepper -- (yellow and/or orange), diced
1 teaspoon minced garlic
1/8 teaspoon red pepper flakes
3 ounces linguine -- or tagliatelle
3 1/4 ounces goat cheese
3/4 cup cherry tomatoes -- halved
1/4 cup frozen peas
1 tablespoon chopped fresh parsley
1/2 small lemon -- cut into 2 wedges


Bring a pot of salted water to a boil for the pasta.


Toss the seafood, zest, and seasonings in 1 tablespoon of oil and set aside.


Sweat the broccoli, asparagus, onion, and bell pepper in 1 tablespoon oil in a large nonstick skillet over medium heat. Cook until the onion begins to turn translucent, about 5 minutes., then add the garlic and red pepper flakes. Saute 1 minute longer.


Cook the pasta in boiling water.


Add 1/2 cup of the pasta water to the vegetables and simmer until they are crisp-tender, about 2-3 minutes.


Stir in the goat cheese until melted, then add the tomatoes, peas, parsley, and salt & pepper to taste.


Transfer the cooked pasta from the water to the pan using tongs; toss to coat with sauce. Keep the pasta warm over very low heat.


Heat a nonstick skillet over mediuim-high. Sear the scallops until browned on one side, about 2 minutes. Turn them over, add the shrimp, and cook the seafood for an additional 4-5 minutes or just until the scallops and shrimp are firm.

To serve, divide the pasta and vegetables between 2 plates, top with seafood, garnish with lemons.


Source:
"CAH Issue 63"

- - - - - - - - - - - - - - - - - - -

Per serving: 574 Calories (kcal); 31g Total Fat; (48% calories from fat); 29g Protein; 47g Carbohydrate; 72mg Cholesterol; 244mg Sodium
Food Exchanges: 2 1/2 Grain(Starch); 2 1/2 Lean Meat; 2 Vegetable; 0 Fruit; 4 1/2 Fat; 0 Other Carbohydrates


And here is the salad that I served with it. What a Spring theme this meal had! The dressing was a lemon-garlic vinaigrette which I don’t use a recipe for (I use olive oil, fresh lemon juice, honey, Dijon, garlic, salt and pepper). I also served slices of the rosemary-olive oil boulé which I posted about a week ago.


One final note. Spooky is not fond of human food (which is a good thing because, although he thinks that he is one, his digestive system is definitely that of a cat). He has never really "begged" , even for seafood when we have it, and when I give him a small piece of fish or shrimp he will sniff at it and walk away. As we ate our seafood primavera, though, he wandered into the kitchen and sat on the floor beside Jack. When my husband was done eating, he allowed Spooky up on his lap where, immediately, Spooky's keen sense of smell directed him to the bowl, which he licked clean.


Saturday, May 9, 2009

Turkey Tortilla Soup

So I was sitting here on the porch a couple of days ago, working on my laptop, and a movement outside caught my eye. I grabbed my camera, which was conveniently on the table beside the computer, and took this photo.


There have been a couple of turkeys hanging around the house lately. They hear the squeaking sound that the birdfeeder makes as I screw apart the top to refill it, and they come running out of the field. I’ll be weeding outside, hear a rustling and a “cluck-cluck” from the holly hedge, and know that I’m being watched. This amuses Jack considerably since the minute he steps outside they run, but I have to be careful that they don’t get too close to me. In their little beady turkey-eyes, I am the provider of meals. They like me.


It was raining, and I had not yet gone outside to refill the bird feeder on that day, and apparently one of the turkeys decided to remind me of my neglectfulness. Or stop by for a drink from the fish-pond. In either case, Spooky was not particularly happy since he considers himself the King of our farm and he has not given these interlopers permission to be here as well. He stares at them very fiercely. He hisses as they walk past. They do not care a bit.


I felt a little badly because in the kitchen, simmering on the stove, was a pot of turkey stock. I had roasted a large turkey breast a couple of days previously and had planned to make a turkey-veggie-rice soup on this rainy day. However, before I got the chance, I found a Cuisine At Home recipe which called to me.


Turkey Tortilla Soup.


I have made several versions of tortilla soup, both chicken and vegetarian, but this one was different and not just because of the turkey. Every other recipe I have made uses baked tortilla strips either as a garnish, or piled in the bowl with the soup ladled over it. This recipe used corn tortillas as a thickener, with no crunchy strips added.


And it used some cream (although we know that I substituted for that!) to make a creamy soup rather than a brothy one.


Now, as I mentioned, I made changes.


  • I subbed lowfat half & half for the heavy cream (and I whisked 1 tablespoon of cornstarch into it to thicken the soup even more)
  • Decreased the amount shredded cheese and "reassigned" it to being a garnish (rather than melting it into the soup)
  • Added avocado, tomato, and chopped fresh cilantro as a garnish.
  • I also (inadvertently) forgot about the sour cream. :)


This soup was so very good and it will now be our favorite tortilla soup. I’m thinking that I could add cooked black beans next time, but I will keep my garnish of tomato, avocado, and cilantro because those flavors really did well with the soup. And maybe I'll remember to add the (light) sour cream, too.


I used my immersion blender to puree the soup while still in the pot. I love my immersion blender, though I do not use it often. But it saves me having to clean the blender!


Turkey Tortilla Soup


2 T. olive oil
1 1/2 cups onion -- minced
2 T. garlic -- minced
3 corn tortillas (6 inch each) -- cut into 1 inch pieces
1 can diced tomatoes with green chilies (101/2 oz.)
4 cups chicken broth
1 t. ground cumin
1 t. ground coriander
1 t. dried oregano
1/2 t. cayenne


2 cups cooked turkey or chicken -- shredded or cubed
1 1/2 cups frozen corn kernels
1/2 cup heavy cream
1 cup Monterey Jack cheese -- shredded
2 T. fresh lime juice
Salt and pepper
Sour cream


Heat oil in a large saucepan over medium-high; add onions and garlic, and sauté 3 minutes. Stir in tortilla pieces and sauté until they are no longer crisp. Add tomatoes, broth, and spices, and bring to a boil. Remove from heat; let cool 5 minutes, then puree soup base in batches in a blender or food processor until smooth. Return soup to pot.


Add turkey, corn, and cream. Bring to a boil and simmer 5 minutes, or until beginning to thicken. Reduce heat to medium, sprinkle in cheese, and stir until melted. Add lime juice and season with salt and pepper to taste.


(Cuisine at Home, December 2005, Issue 54, p. 36)
Makes: 8 Cups


Thursday, May 7, 2009

Soft Chicken Tacos with Lime and Avocado

So many recipes, so little time…


For the past 3+ weeks, as I have been recovering from an asthma attack and have done only as much in the kitchen as I felt like doing, I nevertheless continued to peruse food sites and blogs. The result is a sheaf of recipes that I want to try, yet there are only so many meals in a day. I could pretend that we are on a cruise ship and serve 6 or 7 meals a day; but then both Jack and I would become quite round, and that is definitely not a good thing.


So I have a binder, my “to try” binder, where I place all recipes until I’ve tried them. It is very full now, and I have to start working from this. After I initially try a recipe, I will then write down my changes/ comments, and if there are a lot of them I will retype the recipe into MasterCook, and then file this recipe into one of my huge mega-binders. Unfortunately, the mega-binders become a final resting place for many recipes since there seem to be too many new ones that I want to try and I neglect to return to the favorites. I have to figure out how to remedy this (I did try making a list, but that didn’t work; any comments from those who read this are welcome!).


Tuesday, May 5, was Cinco de Mayo. An excuse for me to plan a Mexican meal, although I really don’t need an excuse.


As luck would have it, I was gone from 10am to 5pm on that day and thought that the recipe I chose would be easy to put together quickly. Well, it was, but I printed it from the AllRecipes website without reviewing it.

Now, I know that we eat healthier meals than many people, and it has become second nature for me to increase the veggies in a dish while decreasing the amount of meat and full-fat dairy. I forget about that sometimes, and when I arrived home and started to cook from the recipe for Lime Chicken Soft Tacos, I was reminded.


After saying “what’s this?” several times, I sat down with a pen and started to write in the numerous changes. The person who submitted this recipe said that it made 10 servings, but there was only one taco per serving, each containing 2-1/2 ounces of chicken, and 1-1/4 teaspoons each of shredded cheese, lettuce, and a single medium-sized chopped tomato divided between the 10 tortillas. This made absolutely no sense to me at all. There was also a procedural error where the recipe instructed to sauté the cubed chicken breast over high heat for 20 minutes. Chicken breast is very lean, and to sauté over high heat for such a long time will surely dry it out.


These tacos, as the recipe directs, are heavy on meat and way too light on vegetables. And only one taco would not satisfy me, let alone my husband. Even though it was getting late, I made some notations then started on my own version which, no big surprise, we enjoyed very much.


I used 8 ounces of chicken breast to divide between the tortillas, and used more lime juice than the recipe called for, plus added ground cumin and chili powder for more flavor. To the recipe I added additional cheese (not a lot, because I used queso fresco and it is not lowfat), tomato, onion, avocado, and lettuce. I also added light sour cream mixed with skim milk to add a creamy and smooth note to the spicy meat, this is similar to the Mexican crema.


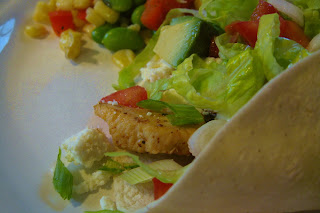
The final result is a wonderfully delicious soft taco. The chicken has a decidedly lime-y taste, and all of the other flavors combine and will make your mouth very happy indeed. :)


Now, the recipe calls for 4 tortillas, although I actually used 5 (Jack had one more than I did) and we definitely had enough filling for the extra one. I also sautéed diced red bell pepper, then added frozen corn and edamame and a splash of lime juice for a side.


* Exported from MasterCook *


Soft Chicken Tacos with Lime and Avocado


Recipe By: Vicci

Servings: 2


Amount Measure Ingredient -- Preparation Method

-------- ------------ --------------------------------


4 whole corn tortillas -- heated until soft, per package directions, and placed in a

tortilla server or wrapped in a clean dish towel to keep warm

1 small tomato -- diced

1 cup shredded lettuce

2 ounces queso fresco -- crumbled (or sub shredded Monterey Jack)

1 large green onion -- thinly sliced diagonally

1/2 medium avocado -- chopped

2 tablespoons chopped fresh cilantro -- optional

3 tablespoons light sour cream

2 tablespoons skim milk


2 teaspoons olive oil

8 ounces boneless skinless chicken breast -- cut into 1/4" wide strips

2 tablespoons water

2 tablespoons fresh lime juice

3/4 teaspoon chili powder

1/2 teaspoon ground cumin

1/2 teaspoon brown sugar

1/4 teaspoon kosher salt

1/8 teaspoon powdered chipotle pepper -- optional

1/8 teaspoon freshly ground black pepper

1 large garlic clove -- minced


Prepare the tortillas and keep warm. Prepare the vegetables and cilantro and place in separate serving bowls. In another small serving bowl, stir the sour cream and skim milk until smooth. Set these aside.


In a medium nonstick skillet, heat the olive oil over medium heat. Sauté the chicken strips until they turn opaque and very lightly browned, about 6-7 minutes. While the chicken cooks, mix the water through minced garlic in a small cup. Add to the chicken and stir. Simmer for a few minutes until there is barely any liquid remaining.


Transfer chicken mixture to a covered serving dish. Place on the table along with the tortillas, vegetables, cilantro, and sour cream. Make your own!


- - - - - - - - - - - - - - - - - - -

Per serving: 445 Calories (kcal); 18g Total Fat (4g Saturated); (35% calories from fat); 36g Protein; 38g Carbohydrate; 77mg Cholesterol; 466mg Sodium

Monday, May 4, 2009

Rosemary Olive Oil Boule


A gloomier Monday morning could not exist. Well, perhaps if it were cold out, say 40 degrees instead of our current 55. But the rain has been pouring since early this morning. And the grass is growing, much to Jack’s dismay.


I hadn’t done any baking for a month, and yesterday felt well enough to give it a try. The problem is, we needed everything. Sandwich bread, bread for French toast, an herb bread, muffins for breakfast, and because I had 2 large very ripe bananas, something made from bananas. No, not the muffins because I had my heart set on lemon-blueberry muffins (to me, banana muffins are a “winter” muffin).


Seven hours later, not including the time I had to spend later slicing and wrapping for the freezer, the tally was:


2 loaves four-grain sandwich bread

2 rosemary-olive oil boulés

1 loaf no-knead wheat

24 lemon-blueberry muffins

banana-coconut rum cake with chocolate glaze

and 2 whole wheat pizza crusts, one for the freezer and one for dinner


I was utterly exhausted by the time I got everything cleaned and put away. But now the freezer is full of bread again, and all is right with my happy carb-laden world.


Alas, although the cake is wonderful I have no recipe to post. Actually, it started out to be a banana bread, but I had already used my larger loaf pans for the 4-grain bread and I knew that the batter would rise and flow out of a the smaller 1-pound pan. I altered the original recipe a lot, then when the batter seemed to be too dry, I added several glugs of coconut rum. So I made it into a cake, then when it came out of the oven I scattered bittersweet chocolate chips over the top, smoothing them after they melted. Maybe some day I will give it another try, because the coconut-rum-banana-chocolate flavor (and only 1/4 cup of oil plus whole wheat flour) made this a relatively healthy and delicious snack.


The new bread recipe that I made is from Cuisine At Home, Rosemary Olive Oil Boule. Of course, I made two (I always double these recipes because breads freeze so nicely).


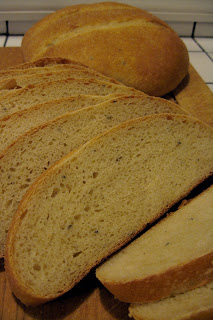
I ran out of both whole wheat and white whole wheat flours (!) so I used only 1 1-2 cups of whole wheat pastry flour in the boules. They are very good, moist with a nice tender crumb and a good, though not overpowering, rosemary scent and flavor. Perfect to serve with pasta!


Because this bread uses a poolish (or biga) as a starter, it must be started several hours ahead. But it is a nice dough to work with, though a tad sticky, and the results are well worth the time.


Rosemary–Olive Oil Boulé


Makes: 1 boulé


Total Time: 4 1/2 hours + cooling


FOR THE POOLISH STARTER—

1 1/4

cups bread flour

3/4

cup room-temperature water (70°–90°)

1/4

tsp. room-temperature active dry or instant yeast


FOR THE DOUGH—

2

cups all-purpose flour

2

tsp. chopped fresh rosemary

1 1/2

tsp. table salt

1/2

tsp. room-temperature active dry or instant yeast

1/4

cup room-temperature water (70°–90°)

1/4

cup extra-virgin olive oil


Combine bread flour, water, and yeast (rehydrated with 1 Tbsp. water from the 3/4 cup) for the poolish starter in a measuring cup or bowl until the mixture looks like lumpy pancake batter. Cover poolish with plastic wrap and let it rest at room temperature for 3–4 hours. Surface will be bubbly. Refrigerate poolish overnight, then let poolish come to room temperature (about 1 hour) before using it in bread dough.


Whisk together 1 1/2 cups all-purpose flour, rosemary, and salt for the dough in a large bowl. Add yeast (rehydrated with 1 Tbsp. water from the 1/4 cup). Stir remaining water into poolish starter. (It will be very thin.) Using a wooden spoon, stir poolish and olive oil into flour mixture until blended. (Dough will be very wet.) Scrape dough onto well-floured surface and turn with bench knife, adding more flour (from remaining 1/2 cup) sparingly, just until dough can be worked with hands. Turn a bowl upside down over dough and let dough rest for 10–15 minutes to develop gluten.


Knead dough until smooth but still slightly sticky. (Do not add more flour to work surface; if needed, flour hands.) Knead 10–15 minutes more by hand (or 8 minutes by stand mixer on medium speed with a dough hook),.


Place dough in an oiled bowl, turning to coat. Cover dough with plastic wrap; let rise in a warm place for 1 hour. Degas dough slightly by tri-folding and flipping it over in the bowl; cover dough again and let it rise for 1 more hour.

Shape dough into boulé. Transfer to a parchment-lined inverted baking sheet. Cover boulé with plastic wrap coated with nonstick spray and let rise 1 hour.


Preheat oven to 475°, with baking stone (or another inverted baking sheet) placed on middle rack. Slash boulé 1/4- to 1/2-inch deep several times across top in design of choice, using a straight-edge razor or serrated knife.


Mist boulé heavily with hot water. Immediately slide boule and parchment onto preheated baking stone (or hot inverted baking sheet). Mist inside of oven with 10 sprays of water; close oven door. Wait 30 seconds and repeat. Reduce heat to 450° and bake boulé 10 minutes. Reduce heat to 425°; bake boulé an additional 10 minutes. Finally, reduce heat to 375° and bake boulé 20 more minutes. Remove boulé from oven; cool bread on rack 45 minutes.


My note: baking took only 30 minutes total, rather than the 40 minutes the recipe specifies. As I use an oven thermometer, I just don't know what happened, so check yours about 10 minutes before it is to be done.


Saturday, May 2, 2009

Making Vanilla Extract

I am afraid that my world is becoming a little too… organized. Now, don’t get me wrong, I’m not going overboard. Years ago, in a Martha Stewart magazine, I saw her tying neatly-folded sheets and towels in her cupboards with satin ribbon (and that has since been my benchmark of someone who has just a tad too much time on her hands). But my junk drawers are organized, my houseplants watered and fertilized, the kitchen floor neatly swept, the mirror above the sink in the bathroom polished—good heavens, for the first time I can remember, I wouldn’t be totally embarrassed if a friend just happened to drop by.

Of course, the garden lies empty. And several windows need to have the loose paint scraped off and be repainted. No flowers have been planted, either. The water lilies in the pond have to be hauled out and replanted, and soon or it will be too late. The outdoor work is suffering, while the inside of my house is looking pretty darn good.

I have to shake this asthma and get on with my life!

Today I crossed off another item on my list and made a new batch of vanilla extract. I have about 1” remaining in my large brown Penzey’s bottle, and although I don’t bake a lot in the summer, what I made today will be nice and rich for next fall. Good heavens, look at what I’m doing!!! It’s the beginning of May and I’m making vanilla extract for fall and holiday baking!

I kind of like this new way of life. It won’t last long, though.

Anyway, I purchase Penzey’s almond extract in large ounce bottles , when I finish, these are cleaned out and used for vanilla extract. The bottles are dark in color, thereby filtering light which may alter the taste of the extract.

I have bought vanilla beans from many sources, but keep going back to Penzey’s. There are 3 long, fat beans in each glass tube, and they’re very fresh and pliable. Vanilla extract, in its purest form, consists of vanilla beans soaked in an liquor base. I have used vodka and bourbon, and this time I am trying rum. Vodka appears to be the best match as it has a rather bland, neutral taste, but I found it a bit harsh. Bourbon was good, with an underlying flavor that I found quite pleasing. I am hoping to get at least that quality of flavor from the vanilla with a rum base.

Commercial vanilla extracts often contain coloring agents and, what I object to, corn syrup or another type of sugar. These are not needed, and you achieve the most flavorful, purest vanilla flavor when you make your own extract and keep it simple.

The vanilla should be allowed to steep in the liquor for at least eight weeks. The reason I am starting another bottle is because my present batch has been “working” for 2 years now, and I just want to start anew.

Vanilla Extract

Start with at least a 16 ounce bottle or jar. Fill it 2/3 with water, and bring to a boil in the microwave (you can also fill the bottle with boiling water). Cover and allow the bottle to stand for 15 minutes to sterilize it. Pour the water out and let cool.

Split 3 large vanilla beans lengthwise, then cut each in half. Place the beans in the bottle (make sure you also transfer even the smallest amount of vanilla which may fall out of the beans), and add 1 ½ cups of vodka, bourbon, or rum (with at least a 40% alcohol content). Cover and shake gently. Label with a date 8 weeks ahead, and place in a cool, dark place. Shake gently at least once a week (or more often).

After the eighth week of “steeping”, the vanilla is ready to use, although the longer it rests, the better.

Now, I usually wait until I have used about 25% of the vanilla extract, then I will add more liquor and one split, halved vanilla bean, and allow it to steep for a week or two before using again (I have allowed my current supply of vanilla to deplete because I wanted to try rum this time.)

Since the bottle is a little larger than the amount of rum that I add, I place the top edge of the label (and don’t we always label everything???) at the “fill” line, then when it’s time to refill with liquor, I know what level is to be.